- Create an OpenAI Account (if you don’t have one already):
- Go to the OpenAI website.
- Click on the “Sign Up” button in the top right corner.
- Fill out the signup form with your email address and a strong password.
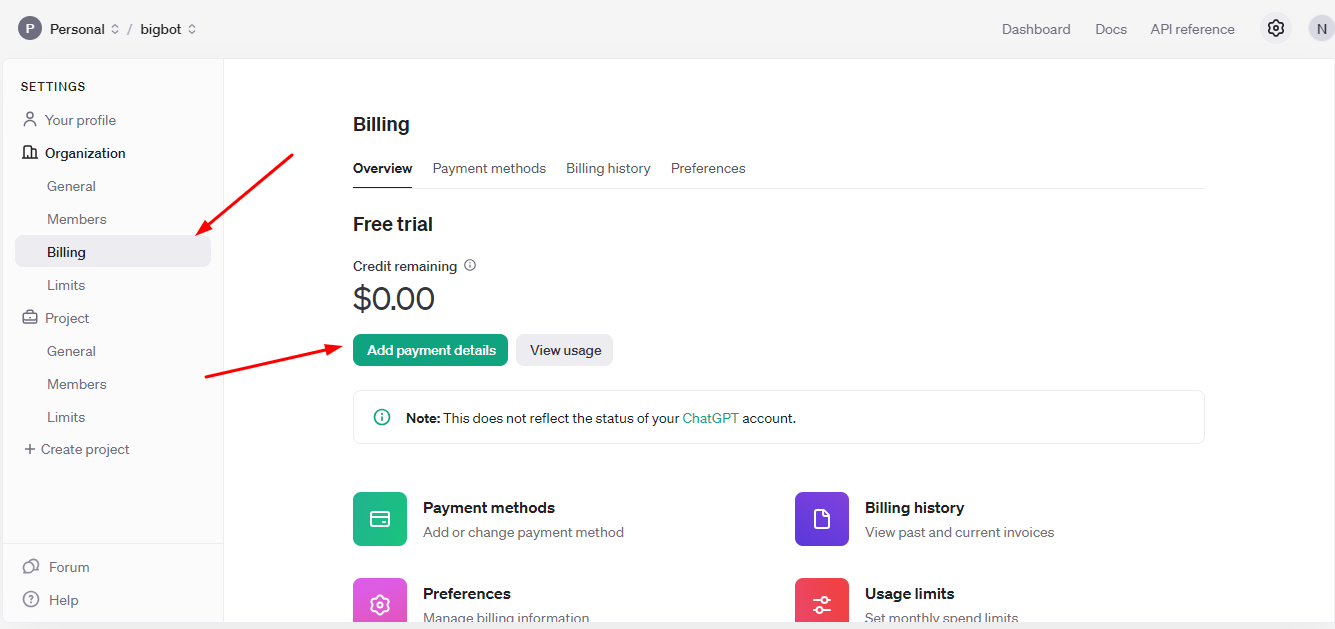
- Billing Information (Important):
- Even for the free tier, OpenAI requires billing information on file. Navigate to your account settings. There should be a section labeled “Billing” or “Payment methods”.
- Click on “Add payment method” and enter your valid credit card information.
- You may also see an option to pre-purchase API credits for your account. This is optional but can be useful if you anticipate exceeding the free tier usage.
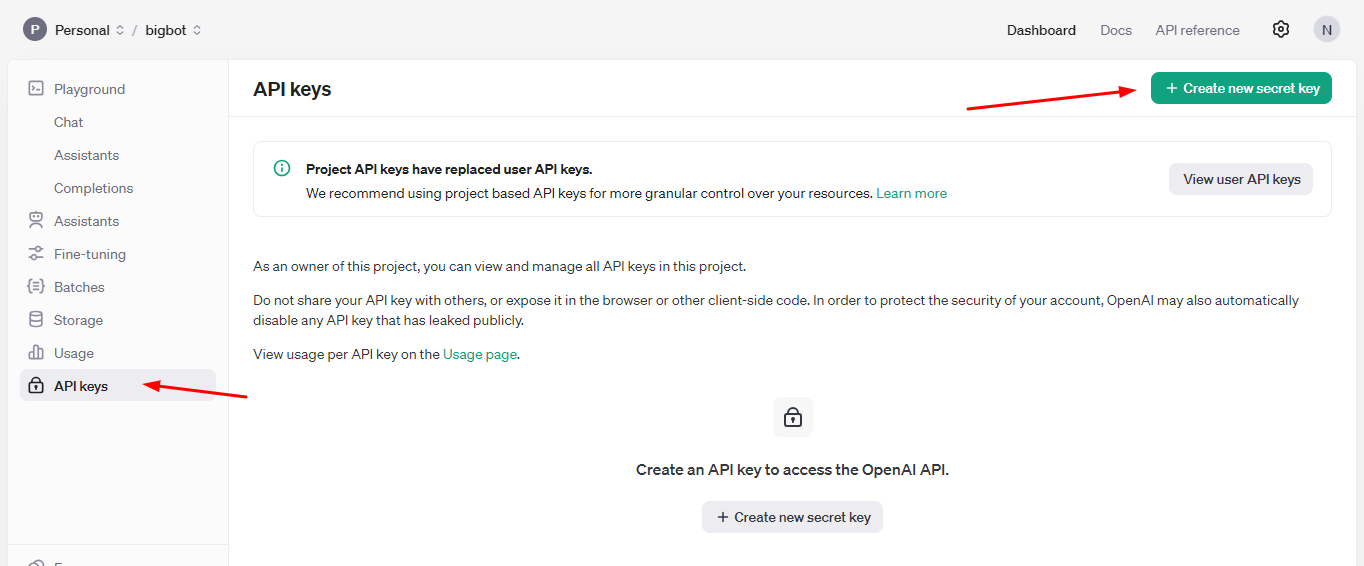
- Navigate to the API Key Page:
- Click on your account name or avatar in the top right corner.
- A dropdown menu will appear. Select “View API keys”.
- Generate your API Key:
- On the API key page, you’ll see an option to “Create new secret key”. Click on that button.
- You can optionally give your key a name for better organization.
- Important: Make sure to copy and save this key somewhere secure. You won’t be able to see it again after this step. Treat your API key like a password and never share it with anyone.
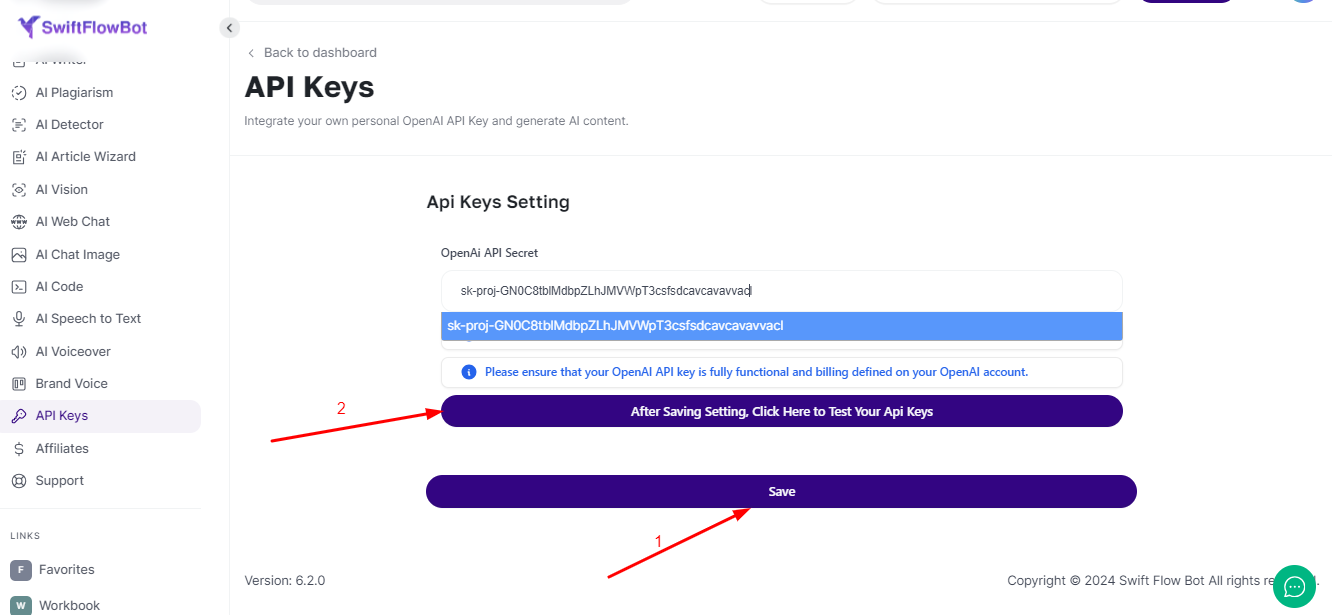
Integrate API Keys with SwiftFlowBot:
- Log into your SwiftFlowBot account.
- Access the Dashboard .
- Find the API Key in Menu.
- Enter your OpenAI API keys in the provided field.
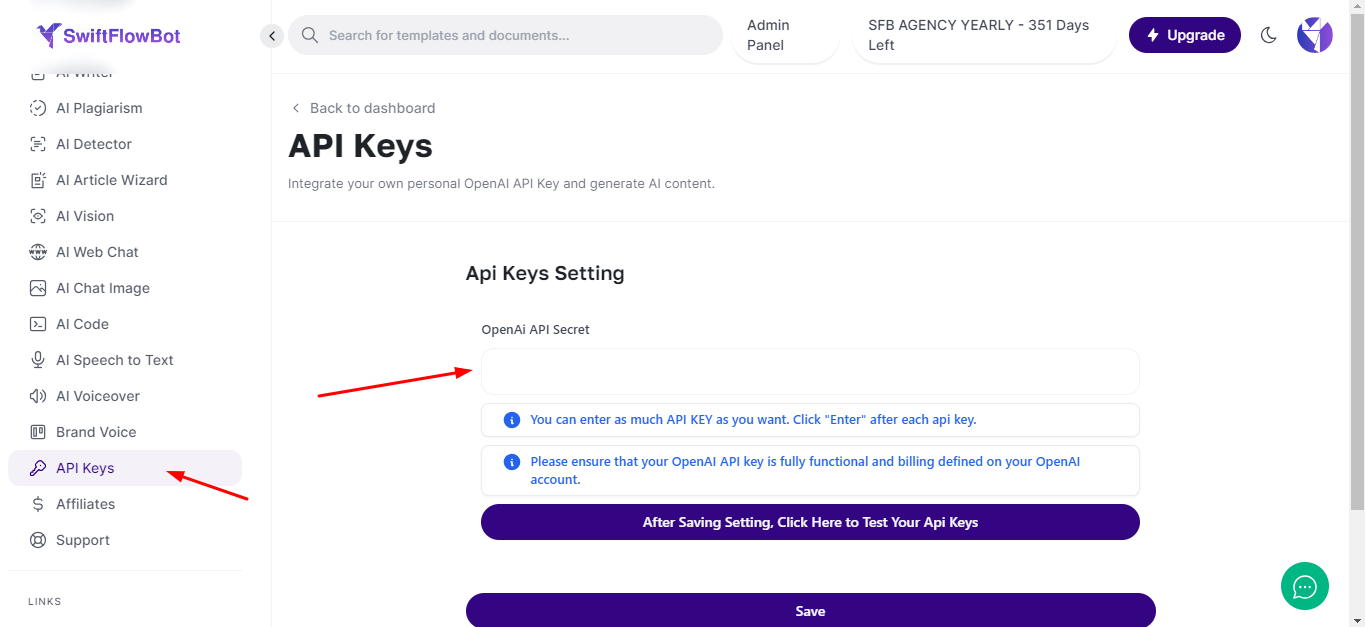
After saving Setting , Click on this button to test your API Keys.