Adding a webhook in SwiftFlowBot is a straightforward process that can be completed in a few simple steps. Follow the guide below to set up your webhook efficiently:
- Sign In to SwiftFlowBot:
- Begin by logging into your SwiftFlowBot account.
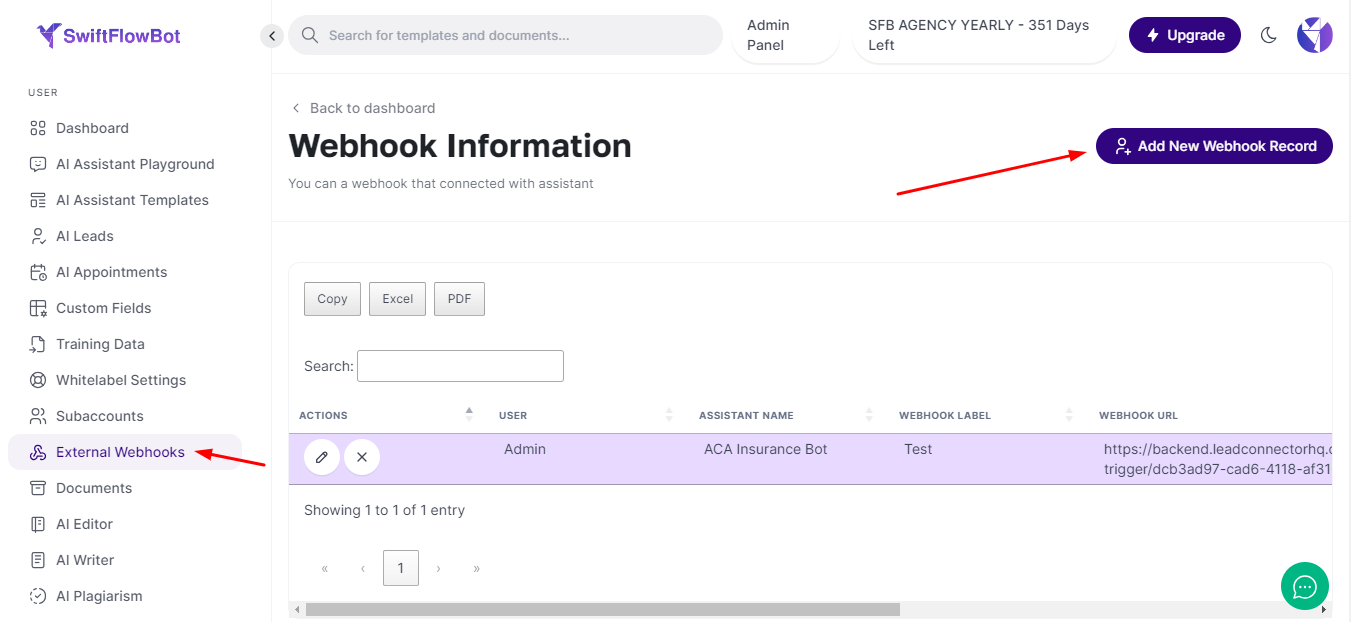
- Navigate to External Webhooks:
- Once signed in, locate the dashboard menu.
- Click on “External Webhooks.”
- Add a New Webhook Record:
- Click on the “Add New Webhook Record” button.
- This action will open a form where you can enter the necessary details for your webhook.
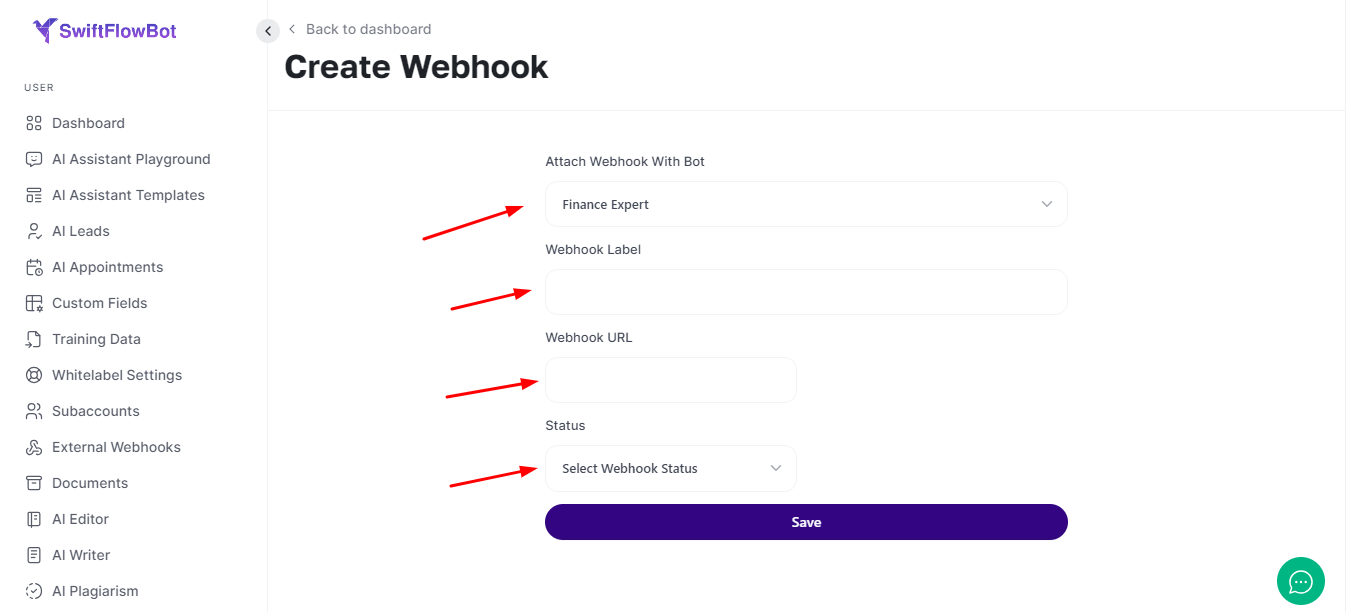
- Configure the Webhook:
- Attach Webhook With Bot: Select the bot to which you want to attach the webhook from the dropdown menu.
- Webhook Label: Enter a name for your webhook in the “Webhook Label” field. This label will help you identify the webhook later.
- Webhook URL: Add the webhook URL from your CRM system in the “Webhook URL” field.
- Status: Select “Activate” from the status dropdown to ensure the webhook is active.
- Save the Webhook:
- Once all the required information is filled in, click on the “SAVE” button.
By following these steps, you can easily manage and configure webhooks to enhance the functionality of your SwiftFlowBot, ensuring it interacts effectively with your external systems.


