Table of Contents
White Label Settings allow you to brand your platform with your own logos and information. Follow these steps to customize your site:
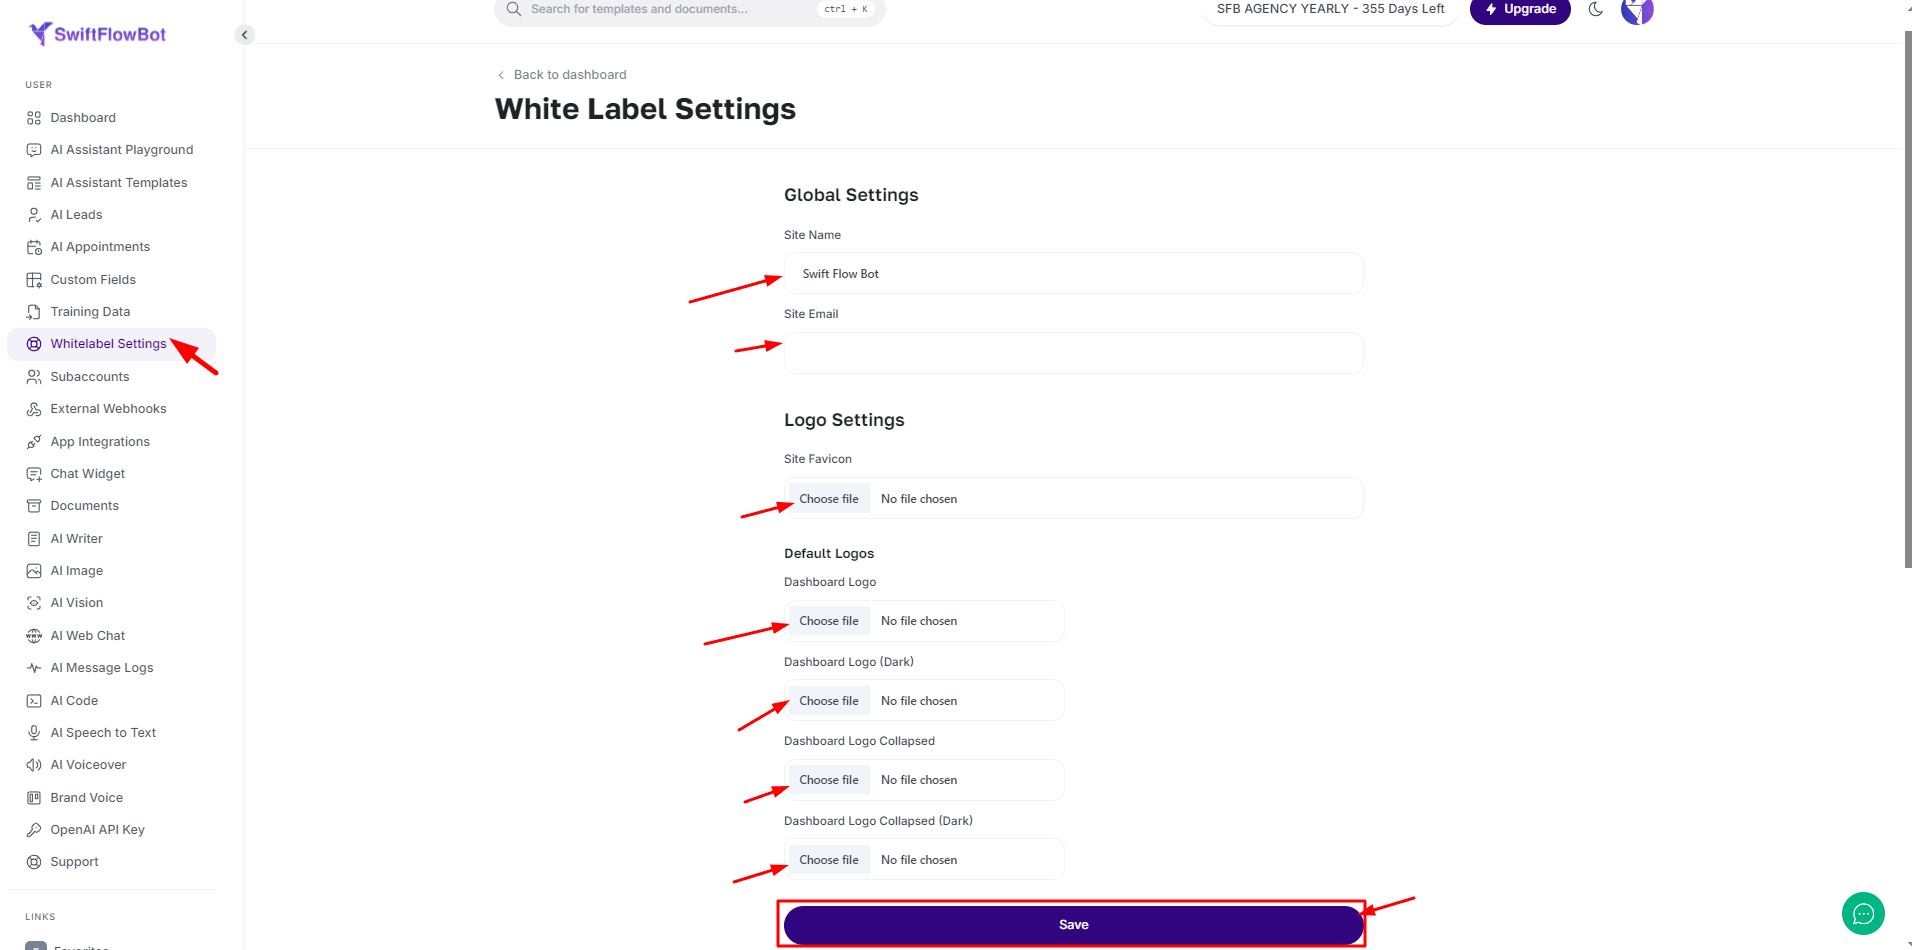
Step 1: Access the White Label Settings #
- Navigate to the White Label Settings section in your dashboard. This is where you’ll handle all your customizations.
Step 2: Set Your Global Information #
- Site Name: Enter the name of your site. This will appear throughout the platform.
- Site Email: Input the email address for official communication.
Step 3: Configure Logo Settings #
- Site Favicon: Upload your site’s favicon, which is the small icon displayed in the browser tab.
- Click “Choose File” to upload your favicon.
- Default Logos: Customize how your logo appears in different parts of the dashboard:
- Dashboard Logo: Upload the main logo for the dashboard.
- Click “Choose File” to upload your logo.
- Dashboard Logo (Dark): Upload a version of your logo suitable for dark themes.
- Click “Choose File” to upload your dark theme logo.
- Dashboard Logo Collapsed: Upload a logo for when the dashboard menu is collapsed.
- Click “Choose File” to upload your collapsed menu logo.
- Dashboard Logo Collapsed (Dark): Upload a version of your logo for the collapsed menu in dark themes.
- Click “Choose File” to upload your dark theme collapsed menu logo.
- Dashboard Logo: Upload the main logo for the dashboard.
Step 4: Save Your Changes #
- Once you’ve made all your customizations, be sure to click Save to apply your branding changes across the platform.