Table of Contents
Automating SwiftFlowBot with GoHighLevel in Simple Steps #
Introduction #
This guide aims to provide you with a straightforward process to automate SwiftFlowBot using GoHighLevel. By following these steps, you can integrate SwiftFlowBot seamlessly into your GoHighLevel workflows, enhancing your automation capabilities.
Step 1: Update Assistant API Keys #
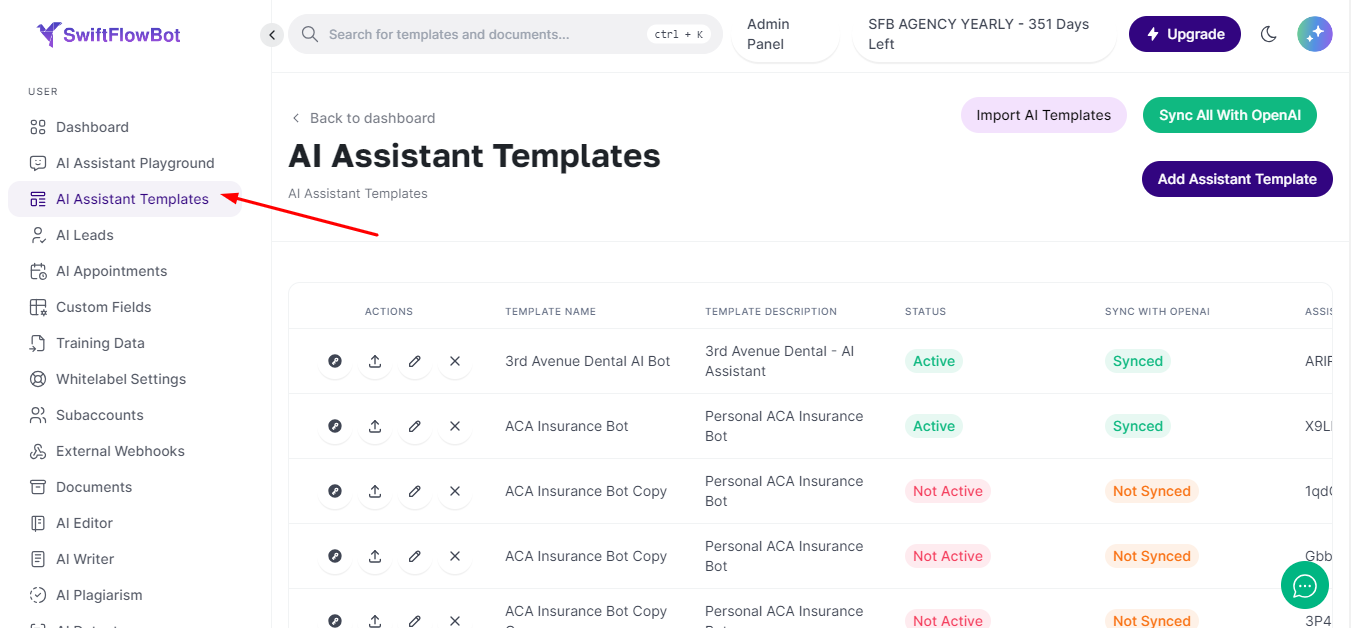
- Navigate to the AI Assistant Template in SwiftFlowBot:
- Log in to your SwiftFlowBot account.
- Go to the ‘AI Assistant Templates’ section.
- Update the Assistant API Keys:
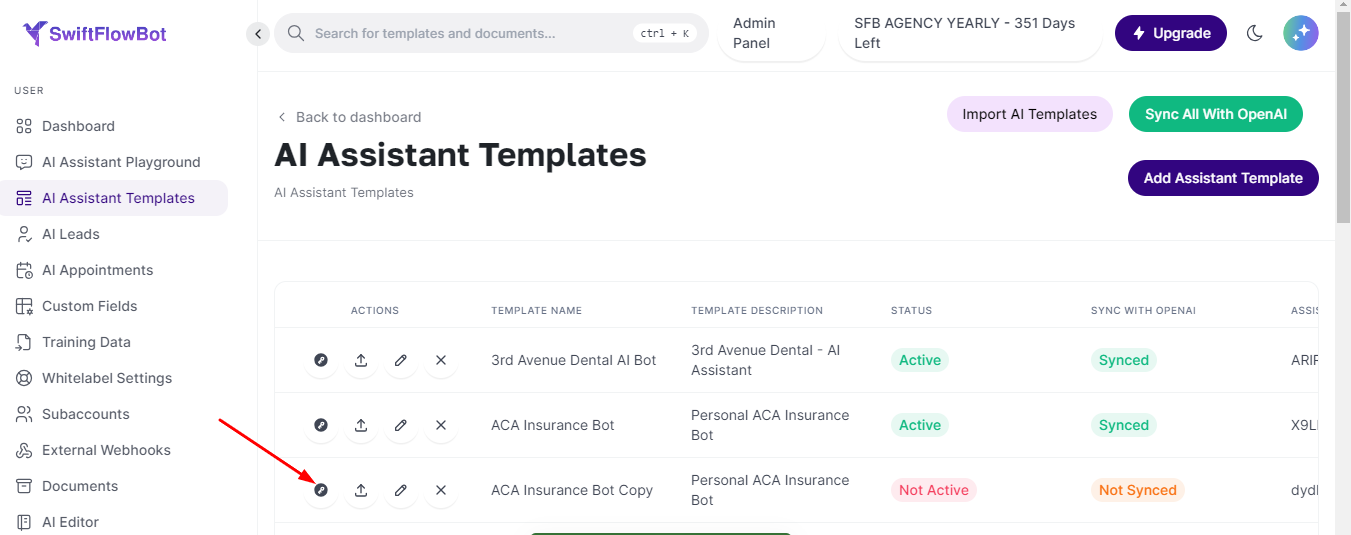
- Select the template you wish to automate.
- Update the API keys with the necessary credentials.
Step 2: Configure Workflow in GoHighLevel #
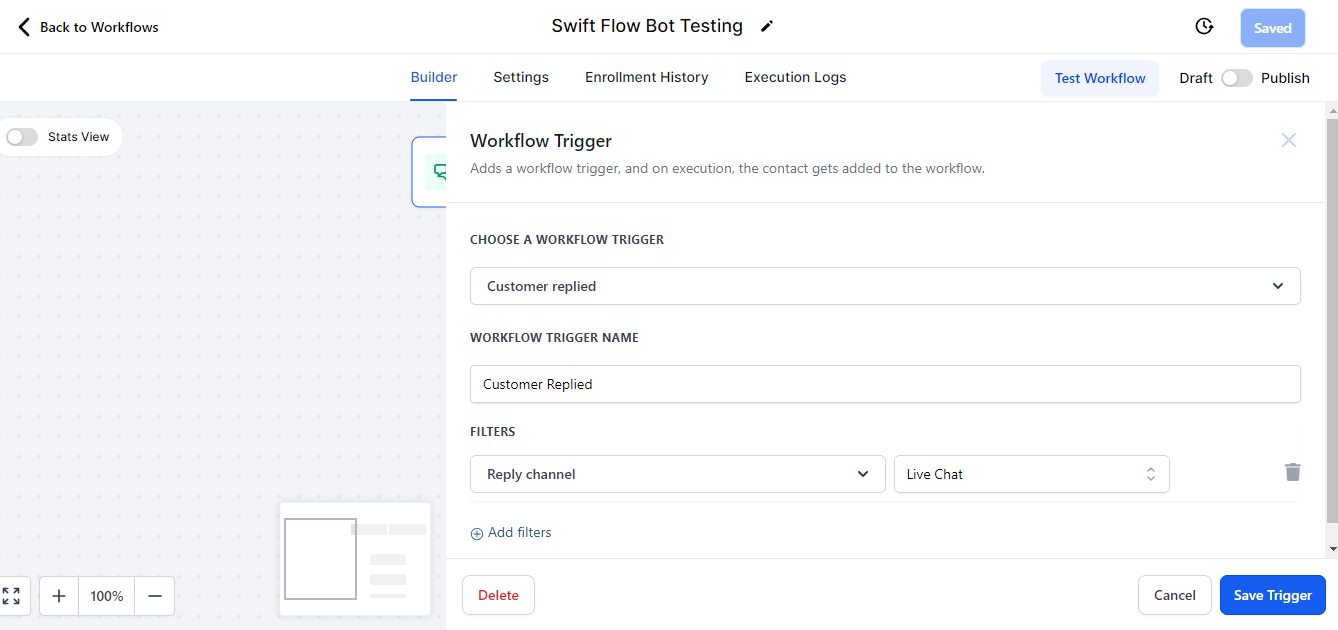
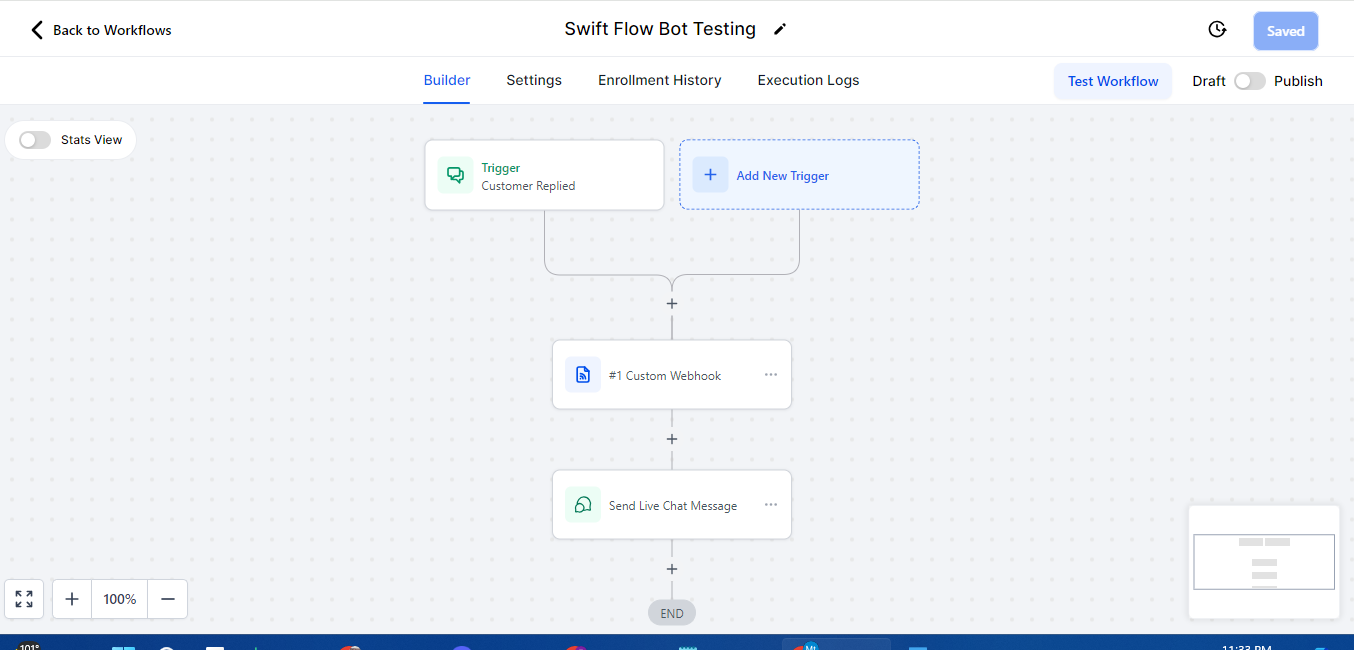
- Add a “Customer Replied” Trigger:
- In GoHighLevel, navigate to the ‘Workflow’ section.
- Add a “Customer Replied” trigger. You can add multiple “Customer Replied” triggers if needed.
- Choose a reply channel such as SMS, Live Chat, Email, Facebook Messenger, and more.
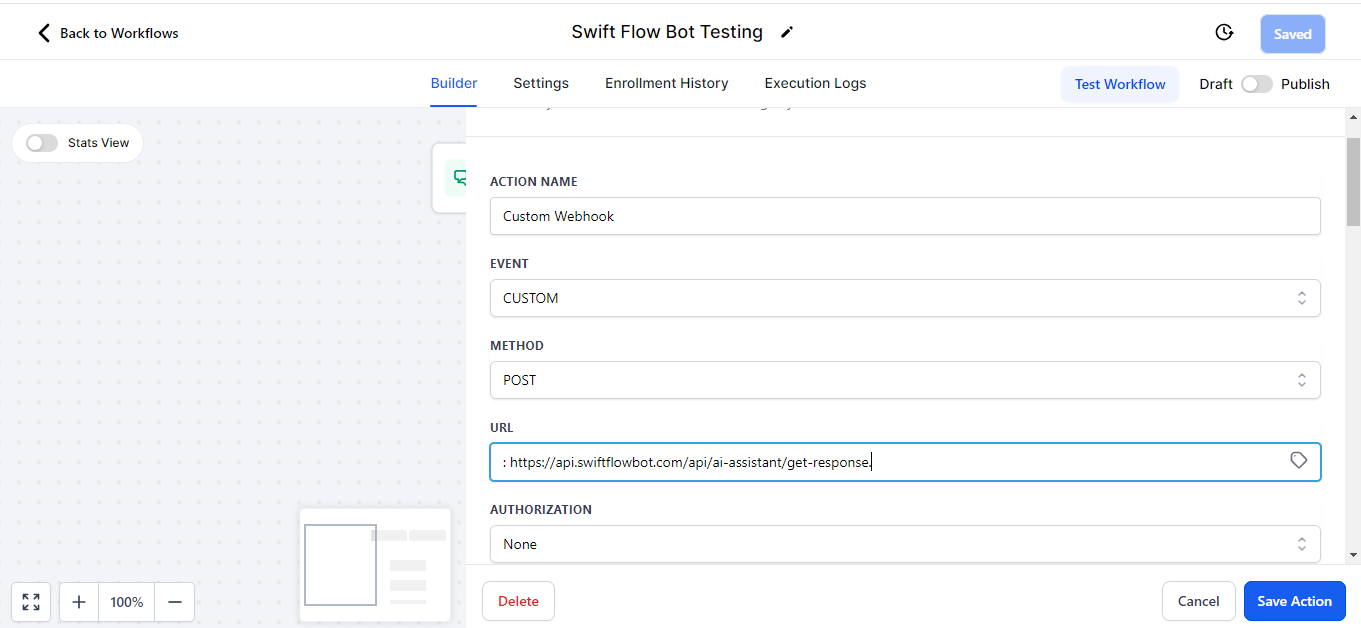
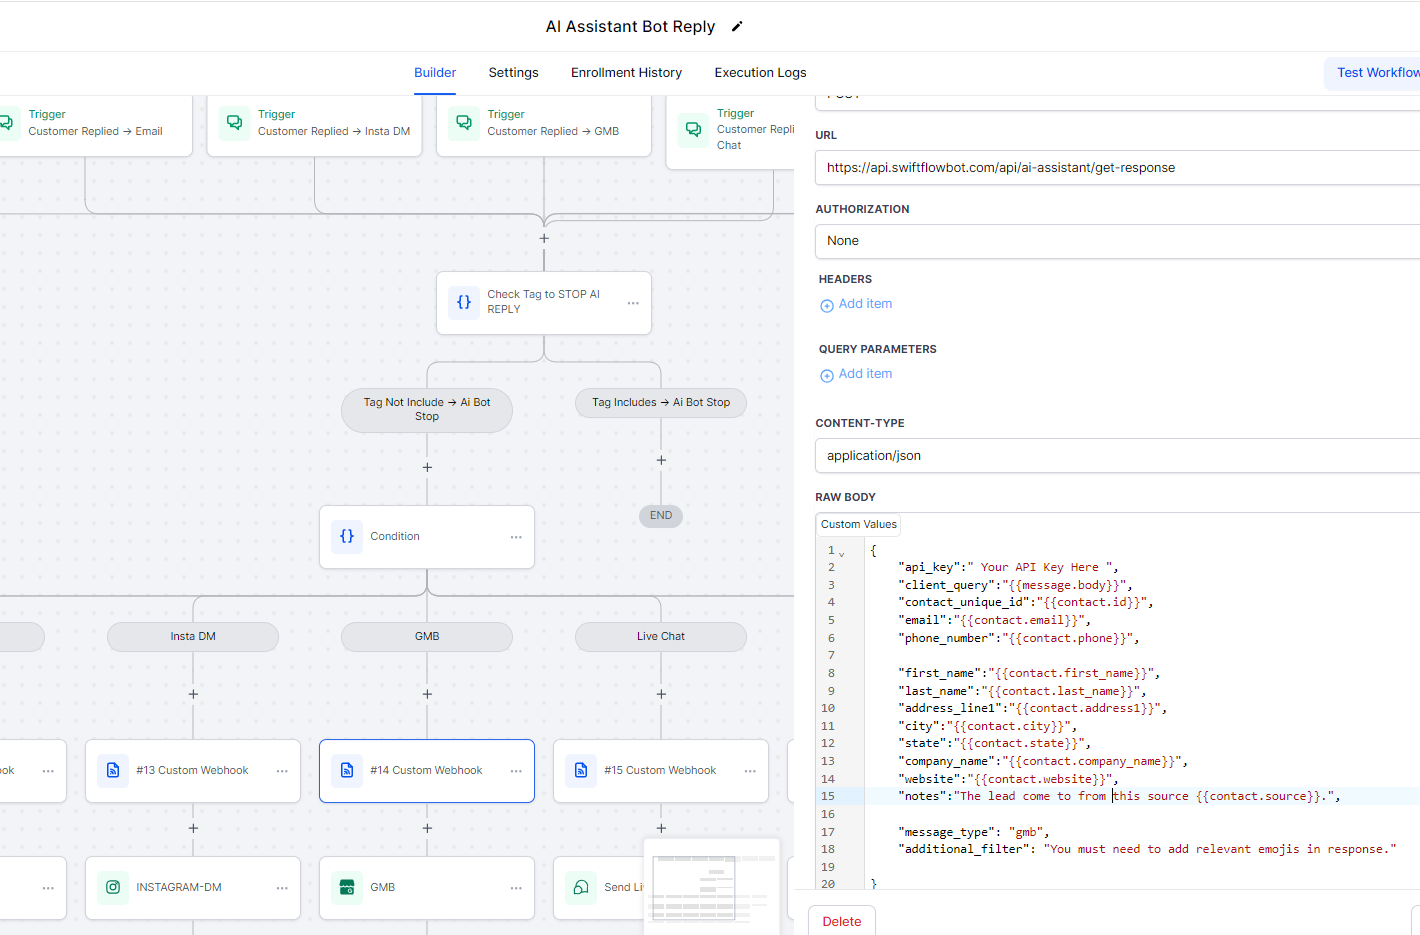
- Add a Custom WebHook:
- In the workflow, add a ‘Custom WebHook’ action.
- Name the action in the ‘ACTION NAME’ field.
- Select ‘Custom’ in the event dropdown.
- Choose ‘Post’ in the method dropdown.
- Add the following URL in the ‘URL’ section: https://api.swiftflowbot.com/api/ai-assistant/get-response.
- Add the Reply Channel and Test:
- Complete the workflow by adding the appropriate reply channel.
- Test the workflow to ensure everything is functioning as expected.
By following these simple steps, you can automate SwiftFlowBot using GoHighLevel efficiently. If you encounter any issues or have further questions, please reach out for support.


