Table of Contents
For Custom Webhook #
For more detailed instructions on using a custom webhook, click on How to integrate SwiftFlowBot in HighLevel with Custom Webhook?
If you don’t have an agency account, you can still integrate SwiftFlowBot with HighLevel using Webhooks. Here’s a step-by-step guide:
You have to create 2 workflows in GoHighLevel to integrate SwiftFlowBot properly #
Workflow 1: Configuring Customer Replies #
Step 1: Configure Workflow No. 1 in GoHighLevel #
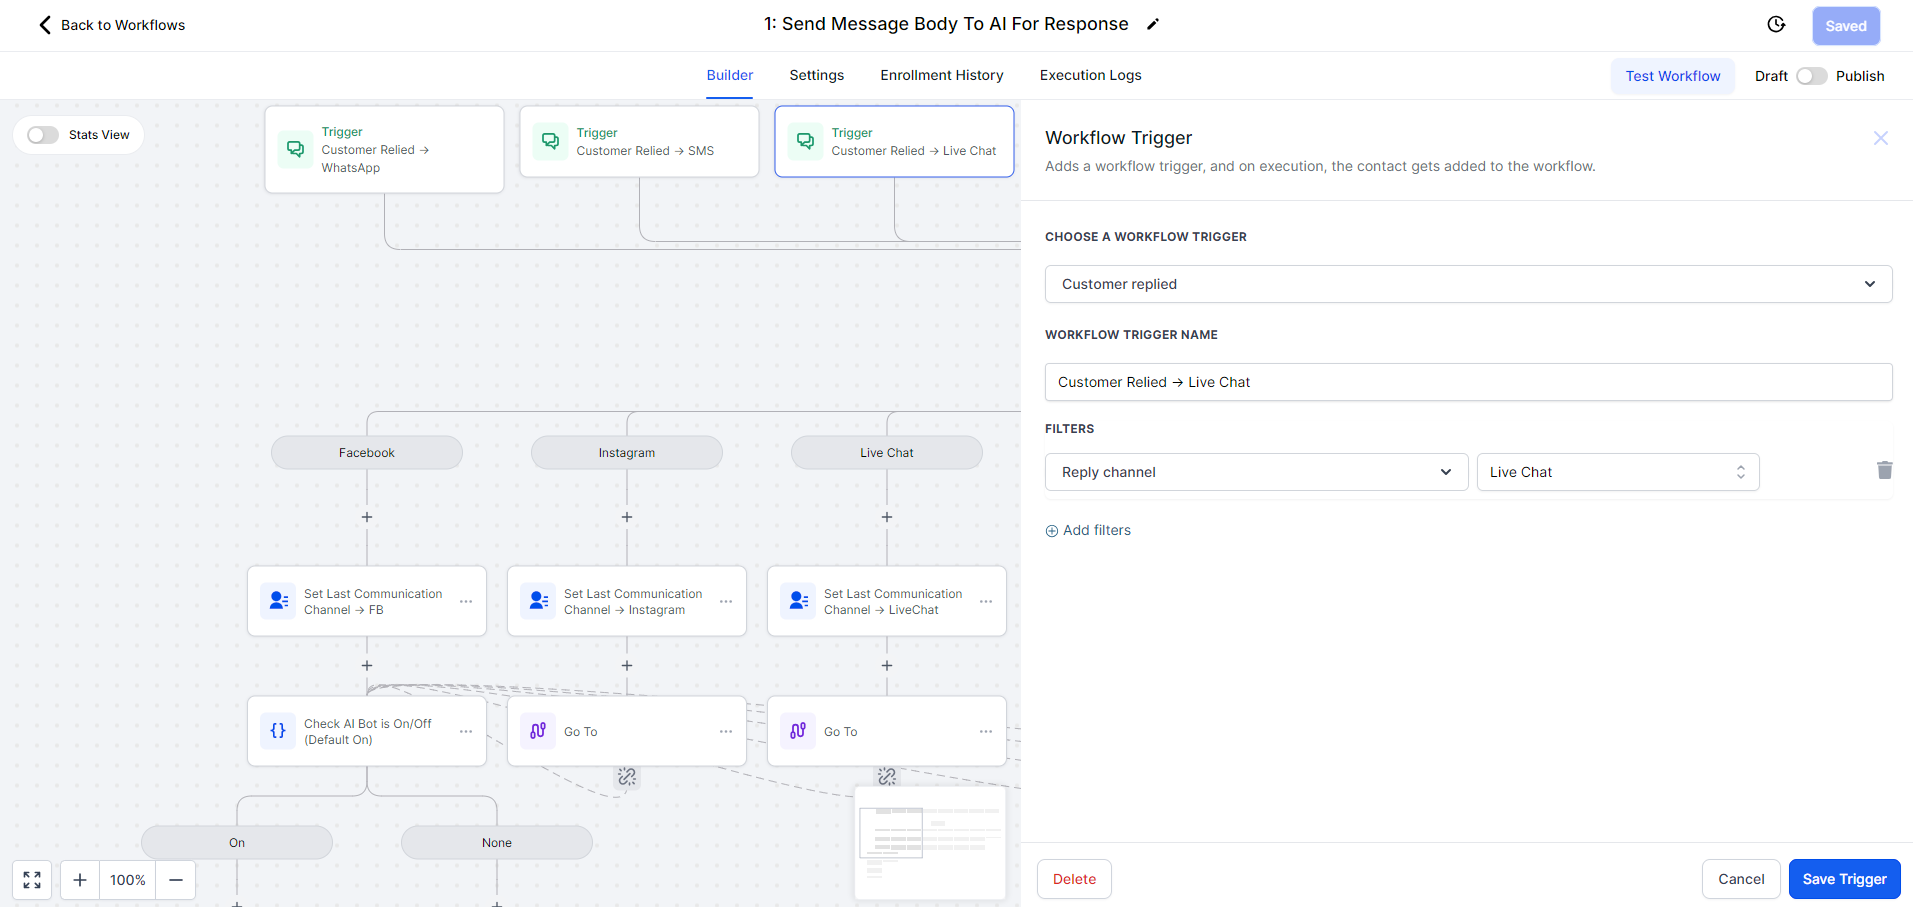
- Add a “Customer Replied” Trigger:
- Navigate to the ‘Workflow’ Section:
- Log in to GoHighLevel and go to the ‘Workflow’ section.
- Add the “Customer Replied” Trigger:
- Select the “Customer Replied” trigger.
- You can add multiple “Customer Replied” triggers if necessary.
- Choose a Reply Channel:
- Select channels like SMS, Live Chat, Email, Facebook Messenger, etc.
- Navigate to the ‘Workflow’ Section:
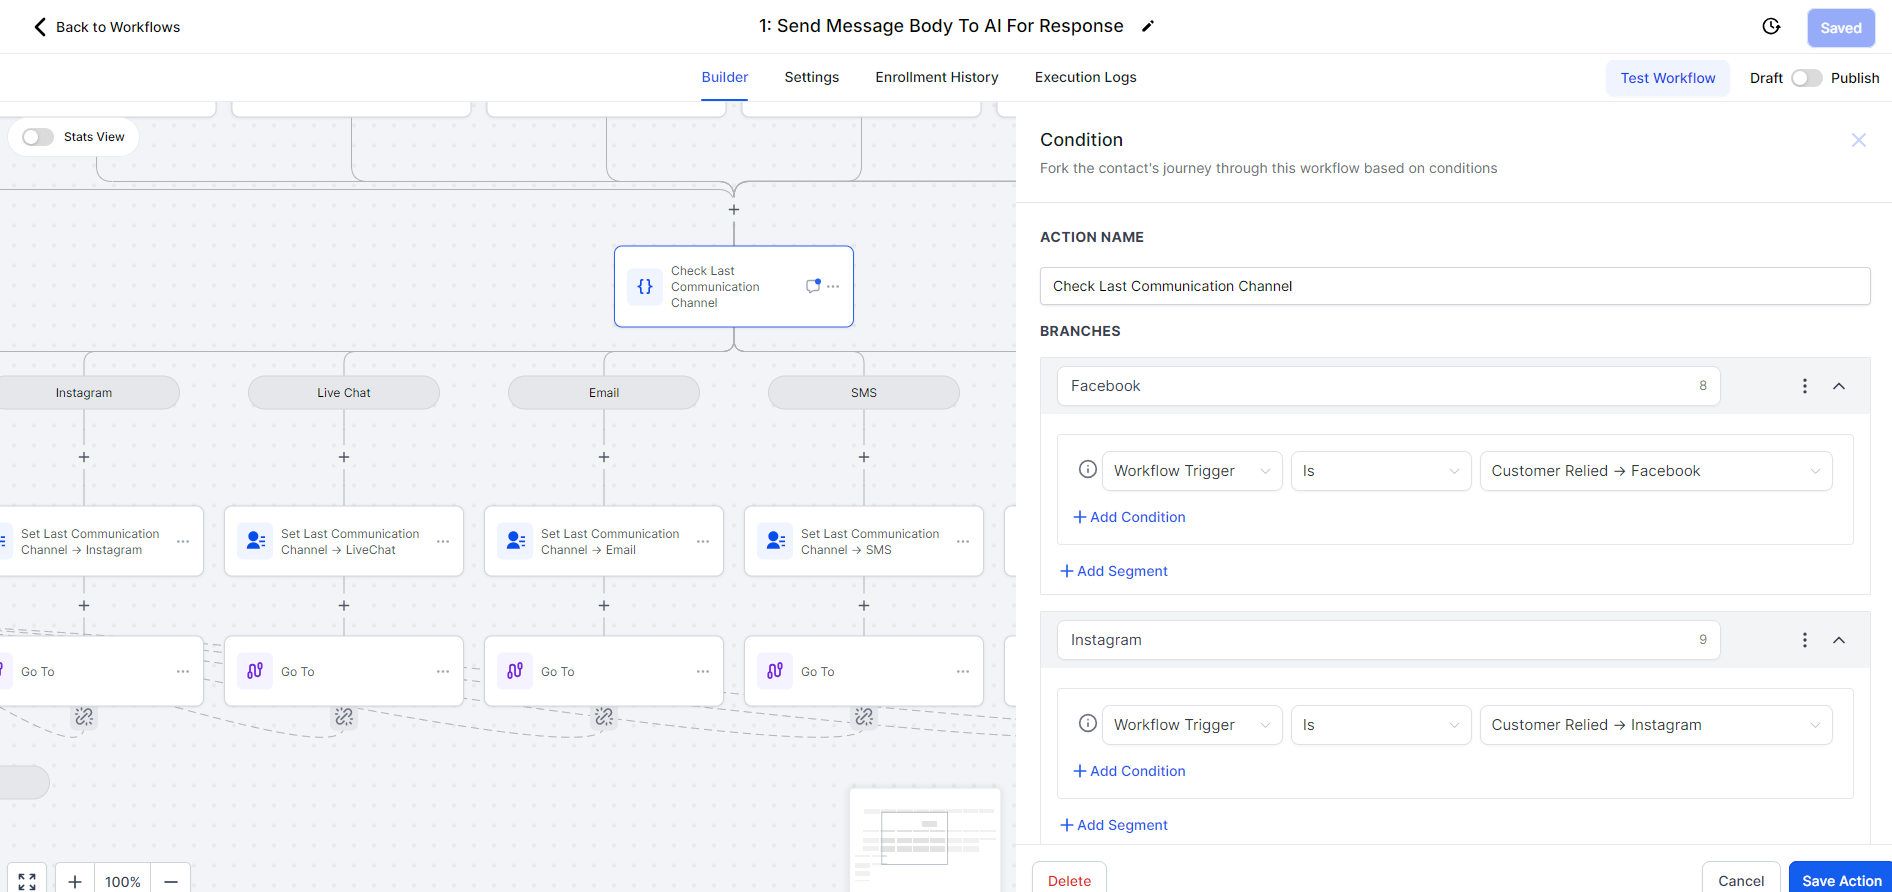
- Set Up Workflow Conditions and Actions:
- Fork the Contact’s Journey:
- Use the “Check Last Communication Channel” action to branch the contact’s journey based on their reply channel.
- Branches:
- Add branches and set conditions according to the last communication channel or contact tags.
- Fork the Contact’s Journey:
-
-
-
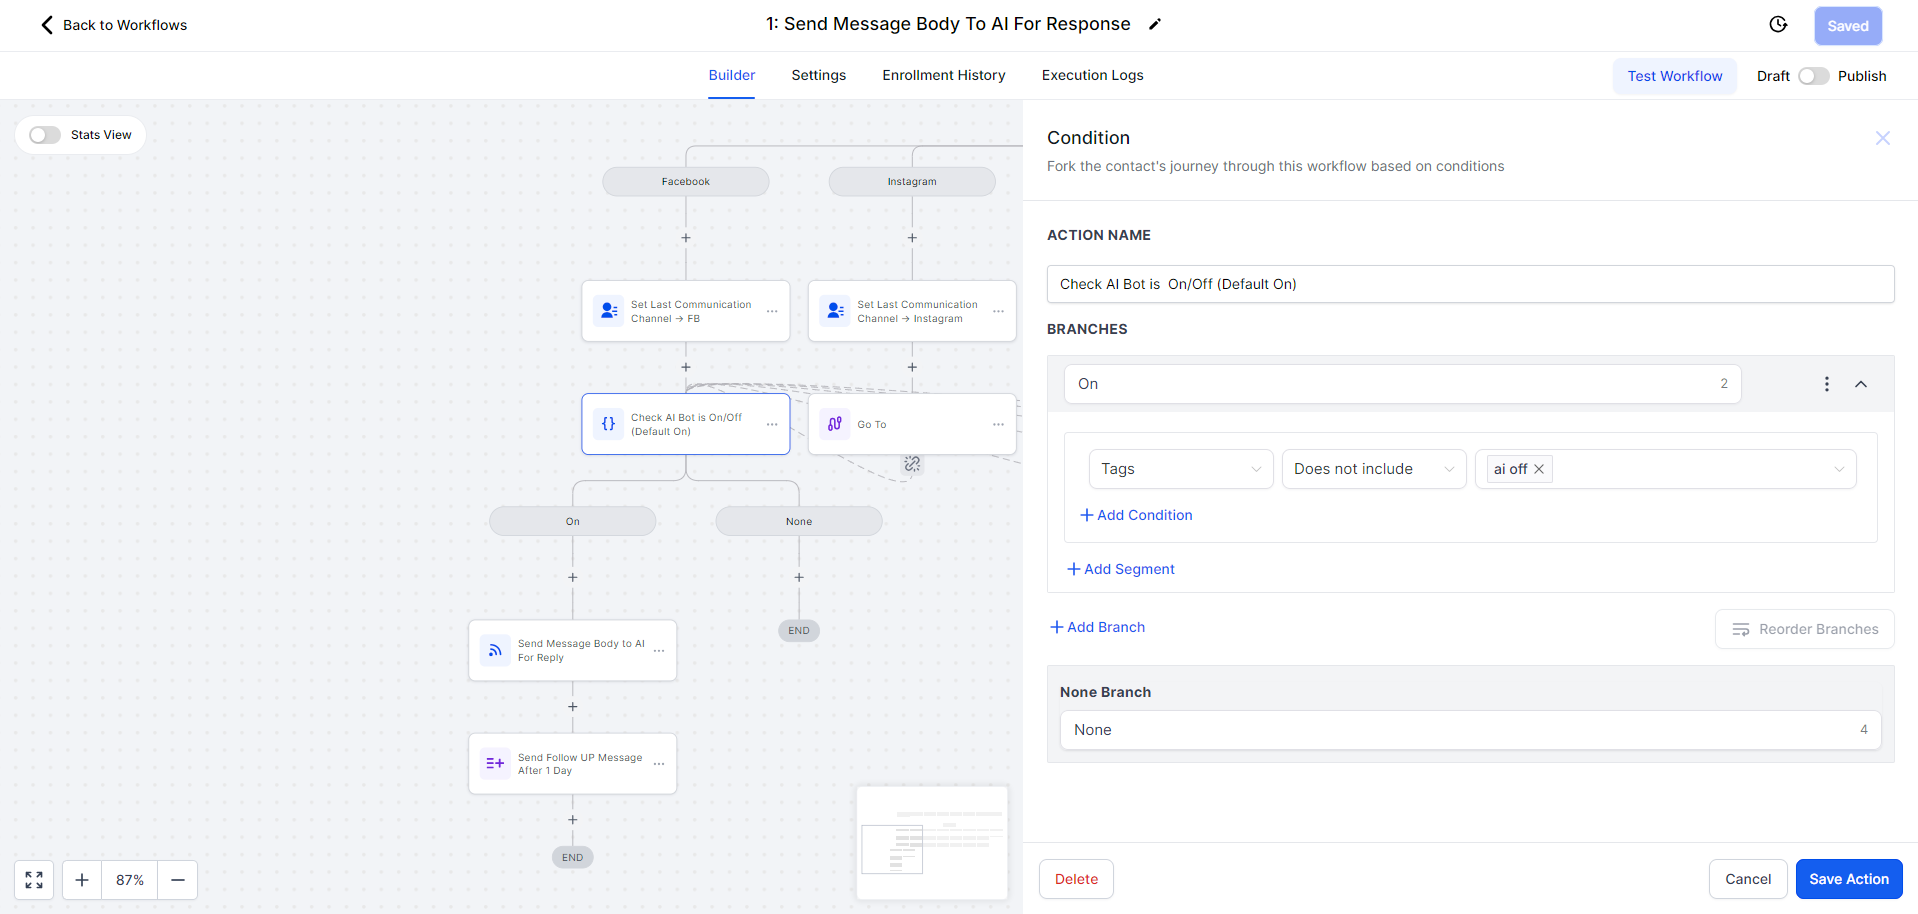
- For Workflow Based on AI Bot Status:
- Add a condition to check if the AI Bot is “On” or “Off.” By default, set it to “On.”
- Branches:
- Create one branch for “On” and another for “Off.”
- Tags:
- Use tags to indicate if AI is off by checking if tags do not include “ai off.”
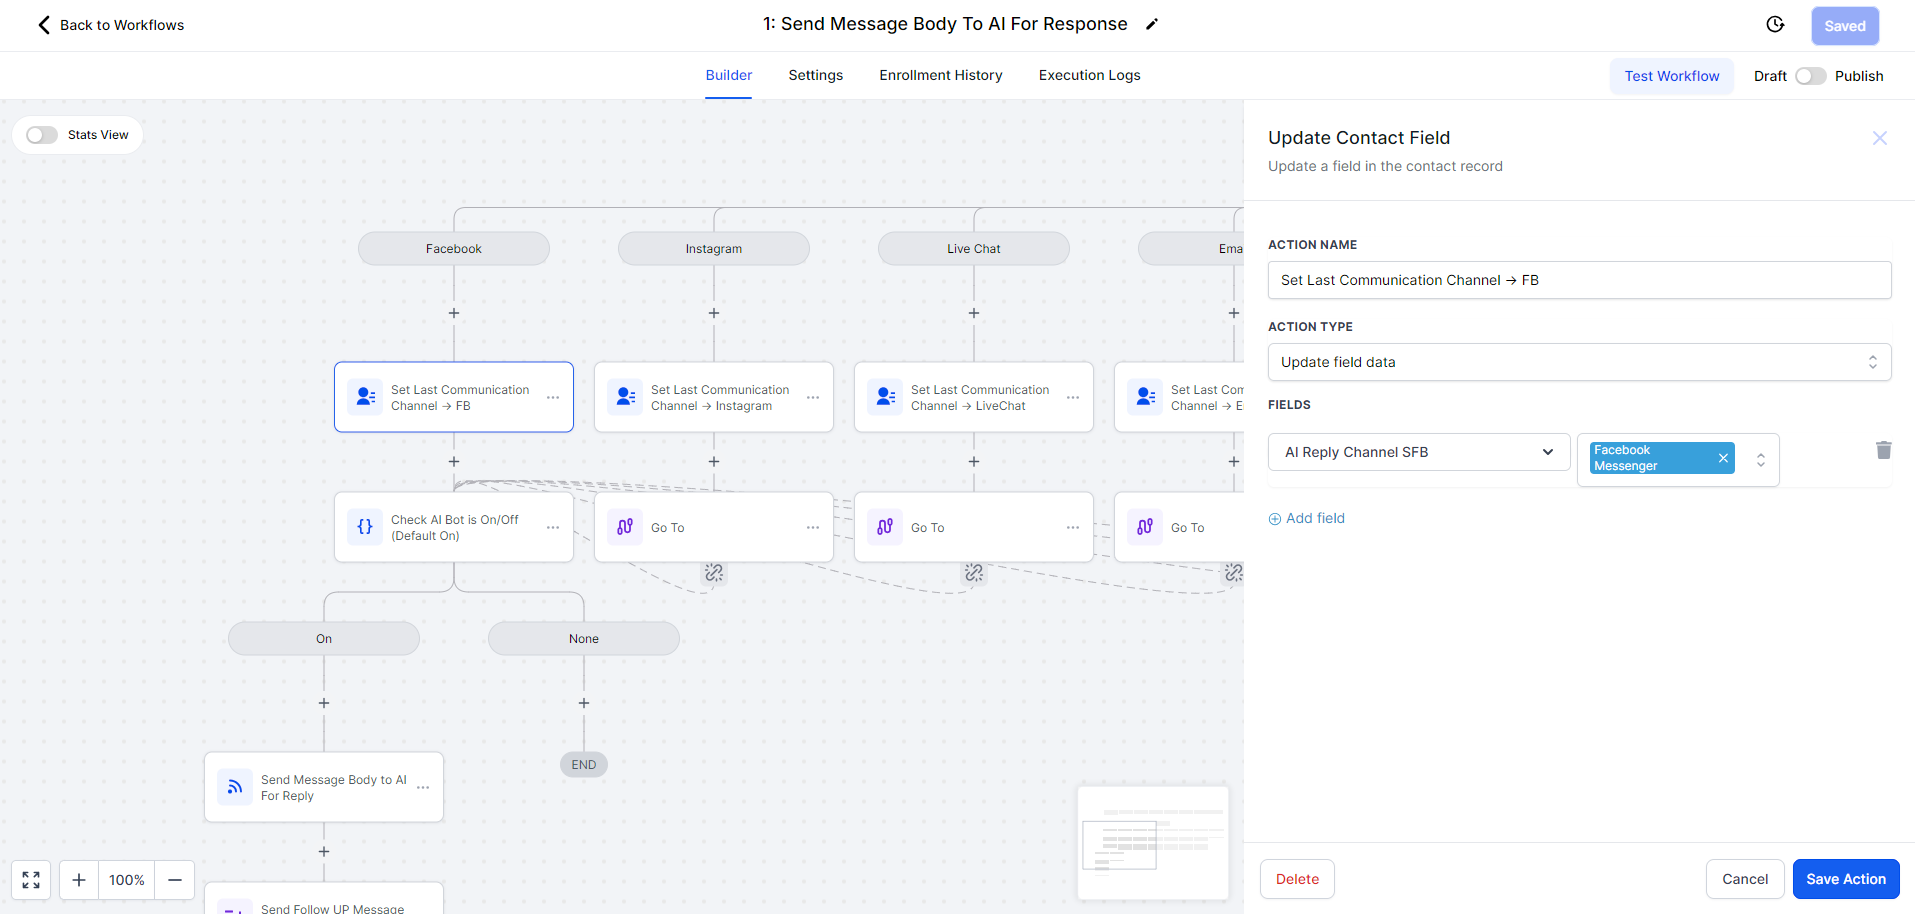
- Update Contact Field:
- Create an action to update a field in the contact record.
- Action Name: Set Last Communication Channel -> FB
- Action Type: Fields
- Field Name: AI Reply Channel SFB
- For Workflow Based on AI Bot Status:
-
-
- Set Up Go-To Actions:
- Go-To Action:
- The “Go To” action allows you to direct contacts to other branches or steps within the workflow.
- Action Name: Go To
- Select Go-To Destinations:
- After saving, select where the workflow should go next.
- Go-To Action:
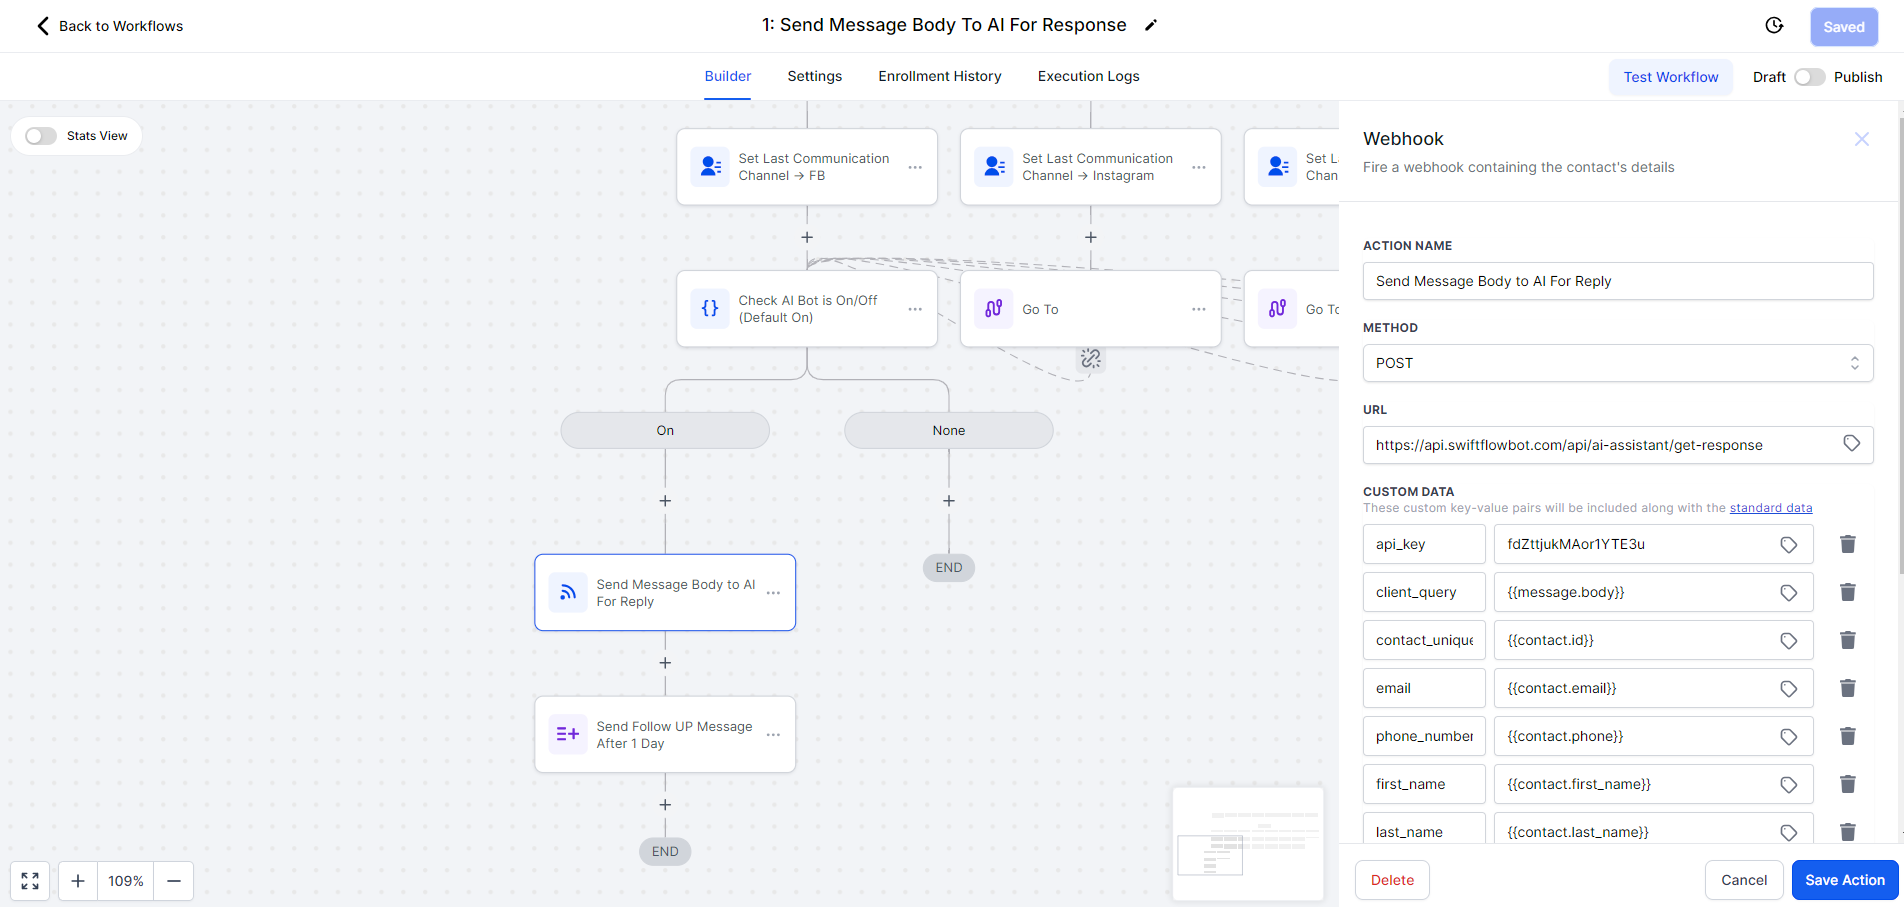
Step 2: Configure the Webhook #
- Add a Webhook to Fire with Contact Details:
- Action Name: Send Message Body to AI For Reply
- Method: POST
- URL:
https://api.swiftflowbot.com/api/ai-assistant/get-response - Include Custom Data in the Webhook:
- Add the following key-value pairs to include necessary contact information:
api_key: Your SwiftFlowBot API keyclient_query:{{message.body}}contact_unique_id:{{contact.id}}email:{{contact.email}}phone_number:{{contact.phone}}first_name:{{contact.first_name}}last_name:{{contact.last_name}}address_line1:{{contact.address1}}city:{{contact.city}}state:{{contact.state}}postal_code:{{contact.postal_code}}message_type:{{contact.ai_reply_channel_sfb}}- Additional Filter:
- Optionally, add emojis or other custom data as needed.
additional_filter: Add Emojis in the message.
- Add the following key-value pairs to include necessary contact information:
- Create the New Custom Field “AI Latest Response SFB”:
- Define a custom field named “AI Latest Response SFB” to store the latest AI response.
Workflow 2: Configuring Responses Based on AI Bot Status #
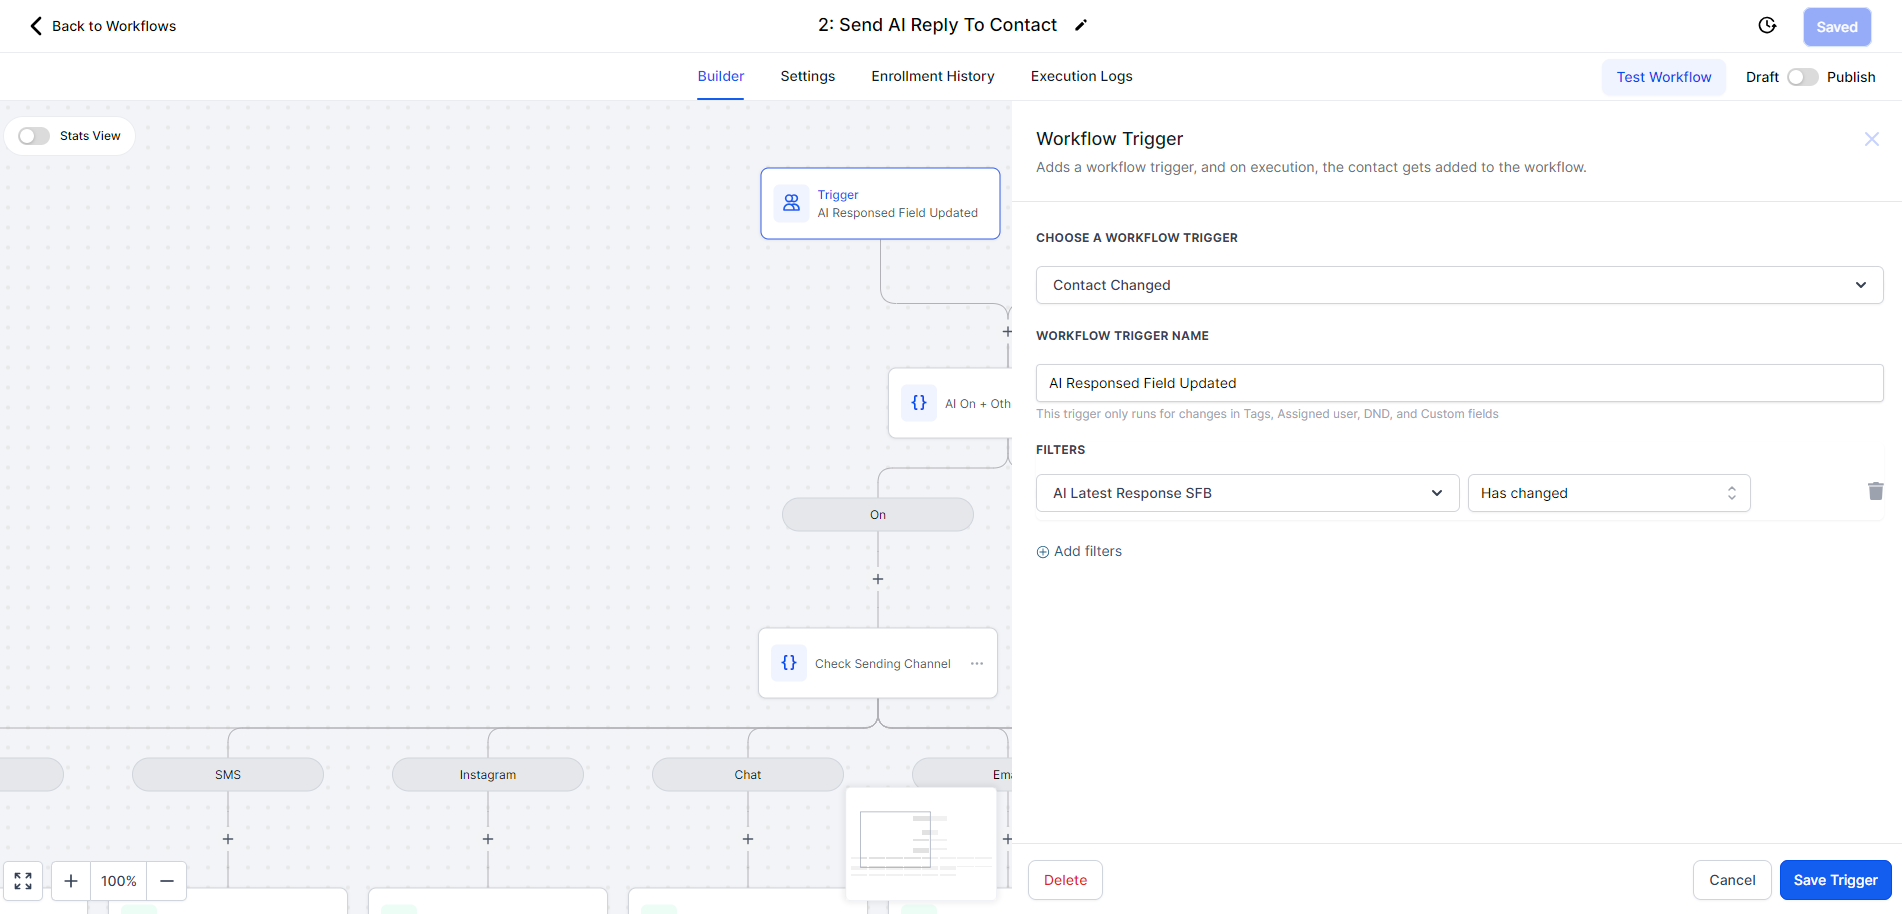
Step 3: Configure Workflow No. 2 in GoHighLevel #
- Add a “Contact Changed” Trigger:
- Navigate to the ‘Workflow’ Section:
- Go to the Workflow section in GoHighLevel.
- Add the “Contact Changed” Trigger:
- Choose the custom field “AI Latest Response SFB.”
- Add Filter “Has Changed”:
- Set the trigger to activate when the custom field “AI Latest Response SFB” has changed.
- Navigate to the ‘Workflow’ Section:
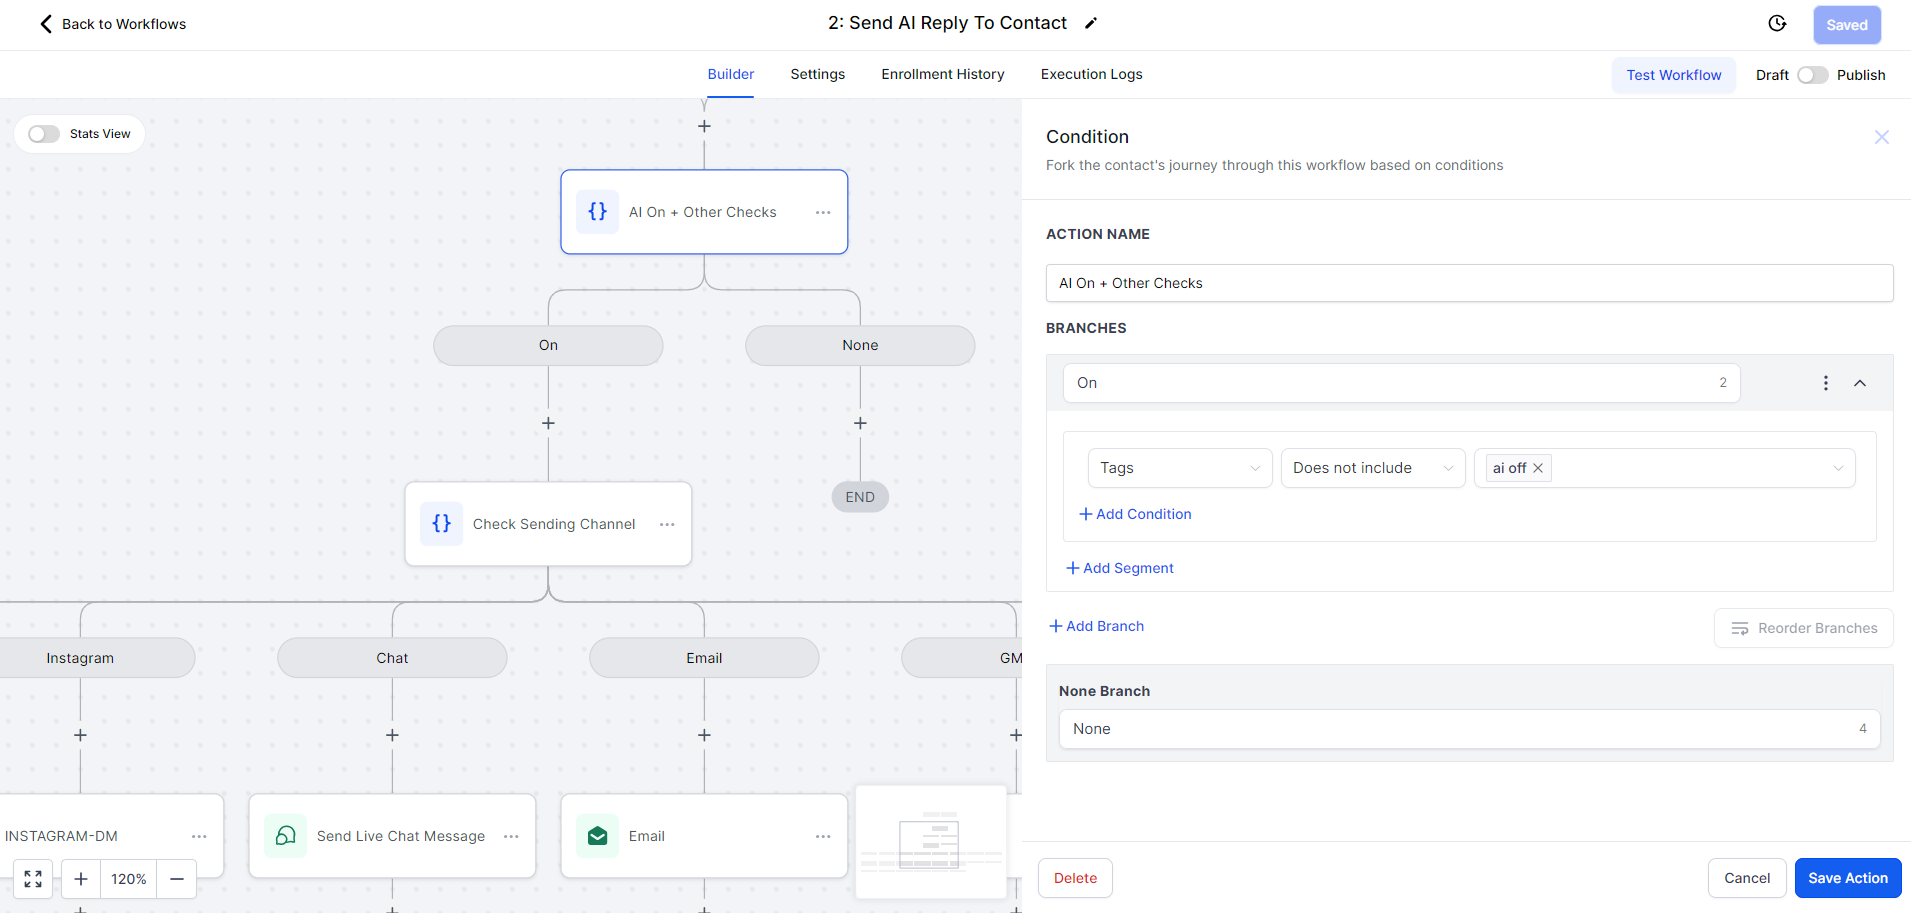
- For Workflow Based on AI Bot Status:
- Add a Condition to Check if the AI Bot is On or Off:
- Set up a condition to check the AI Bot status. The default should be “On.”
- Branches:
- Create branches for “On” and “Off.”
- Tags:
- Use tags to indicate if AI is off by checking if tags do not include “ai off.”
- Add a Condition to Check if the AI Bot is On or Off:
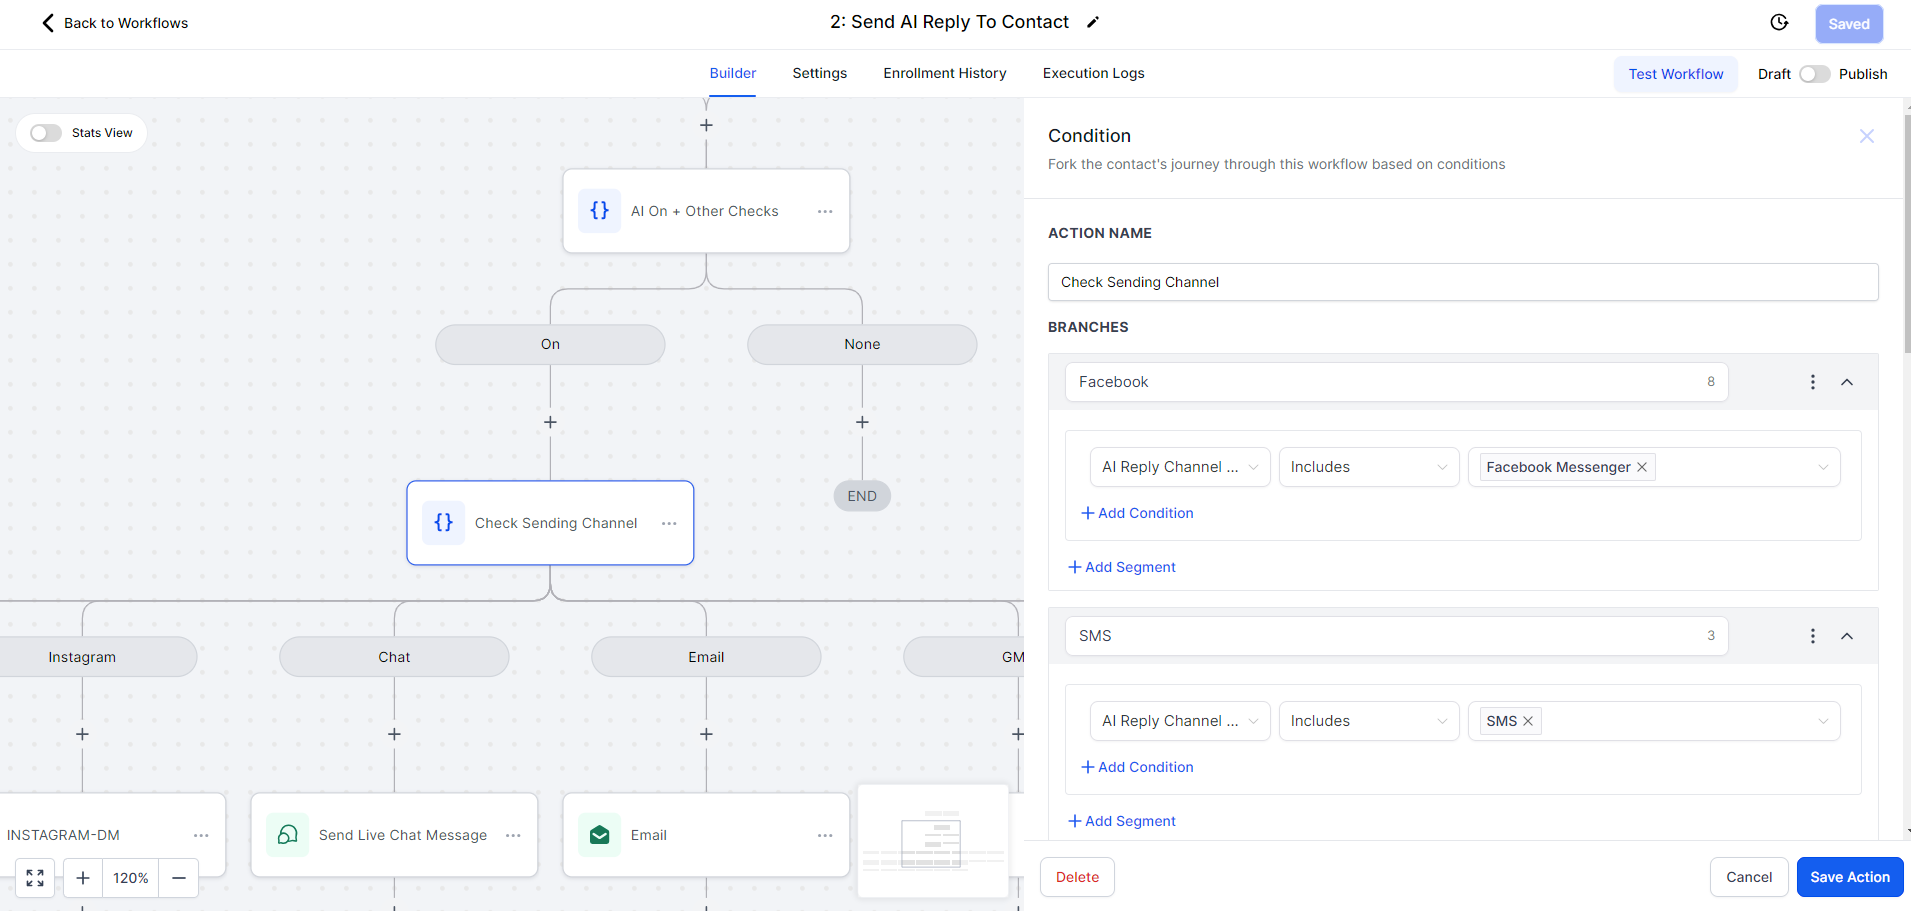
- Specify the Reply Channel:
- Add a Condition to Specify the Reply Channel:
- Action Name: Check Sending Channel -> FB
- Action Type: Fields
- Field Name: AI Reply Channel SFB
- Add a Condition to Specify the Reply Channel:
- Send Reply According to the Channel:
- Select the Message Channel:
- Choose the message channel like Email, SMS, Messenger, etc.
- Set the custom value to
{{contact.ai_latest_response_sfb}}to send the AI-generated response.
- Select the Message Channel:


